Vegan Vanilla Waffles with Vanilla Maple Cashew Cream

Vegan Vanilla Waffles with Vanilla Maple Cashew Cream | Edible Perspective

This post is sponsored by Frontier Co-op.

If you follow me on snapchat (@edibleash...yes, I'm obsessed and also 32), then you may have seen my 10+ failed attempts at this vegan vanilla waffle. Vegan waffles are not the easiest things to make, especially when you throw non-glutinous flours in the mix. But, I was determined and am so glad I stuck it out. Because now, I think I just may have my new, forever, morning waffle.

I can usually tell when a recipe is doomed after the first try or two. But I knew this waffle had potential from the beginning. The main problem was, it just wouldn't hold together as I opened the waffle maker. The exterior was golden and crispy, the flavor was spot-on, it was made with nutrient dense flours, but it just wouldn't hold. So there I stood, trial after trial, scraping waffle bits out of every crevice of the waffle maker, eating most of them and pondering my next attempt. It drove me batty. But this persistence that sometimes comes over me when creating new recipes, is where I feel my true sense of purpose in the kitchen.

I jumped around from adding things like arrowroot starch, psyllium husks, and flax, hoping something would stick. Literally. While a few worked okay, the texture just wasn't what I was after. During these trials, I also started playing around with aquafaba, a new to me cooking ingredient. It sounds completely crazy, but aquafaba is simply the liquid inside of a can of beans (typically chickpeas or white bean liquid). You know, the stuff you drain away and never use! I recently heard this can be used as a vegan egg replacer and figured it was worth a shot to try. While I can't say it works just like an egg in this recipe, it definitely seemed to help keep this waffle together and maybe also help lend a crispier texture (not positive on that). I actually think it's more useful as an egg-white replacer, as it can literally be whisked into meringue....made of bean liquid...insane.

What I figured out to be the most crucial aspects to this recipe were, creating a thick but still pourable batter and thoroughly greasing your waffle iron with cooking spray. The aquafaba probably helped a bit, too. 

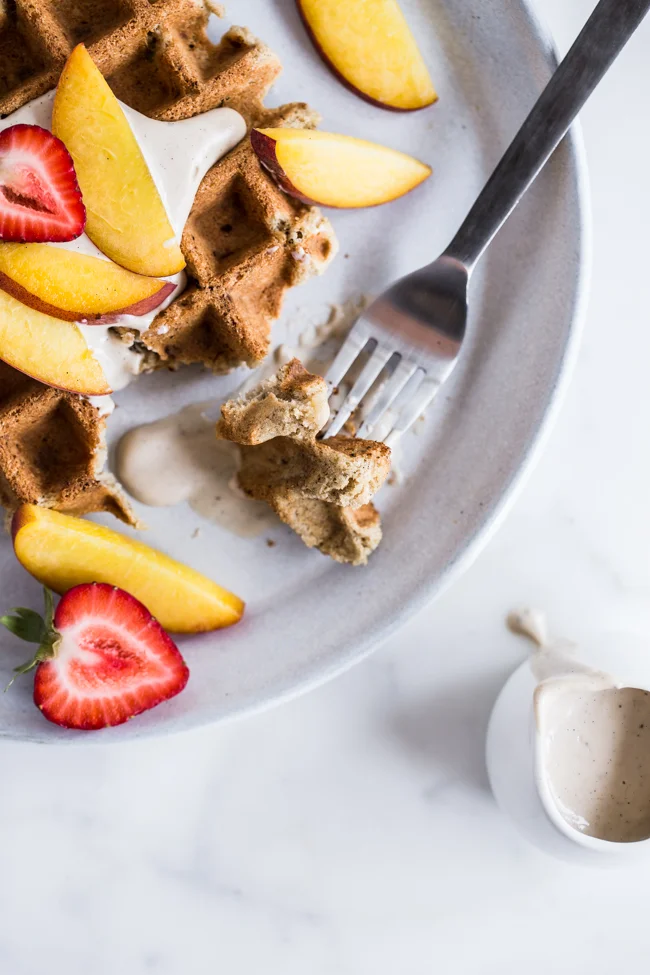
With a generous pour of Frontier Co-op's organic vanilla extract, a 1/2 scraped vanilla bean pod, and a few dashes of their cinnamon, this waffle has the perfect flavor profile. There's a little banana that sneaks in there as well, that adds sweetness, flavor, and moisture. 

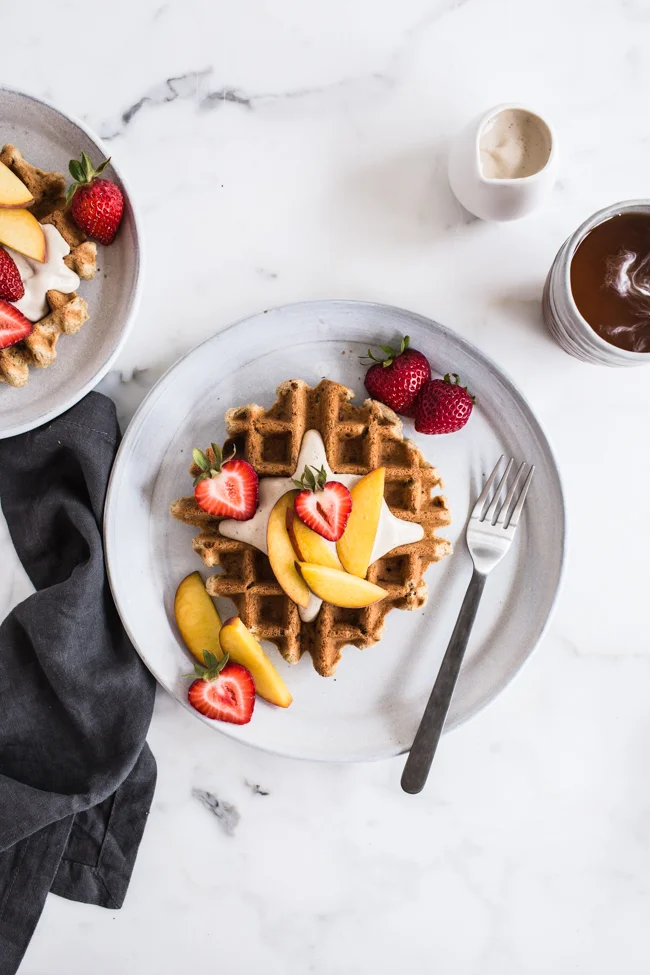
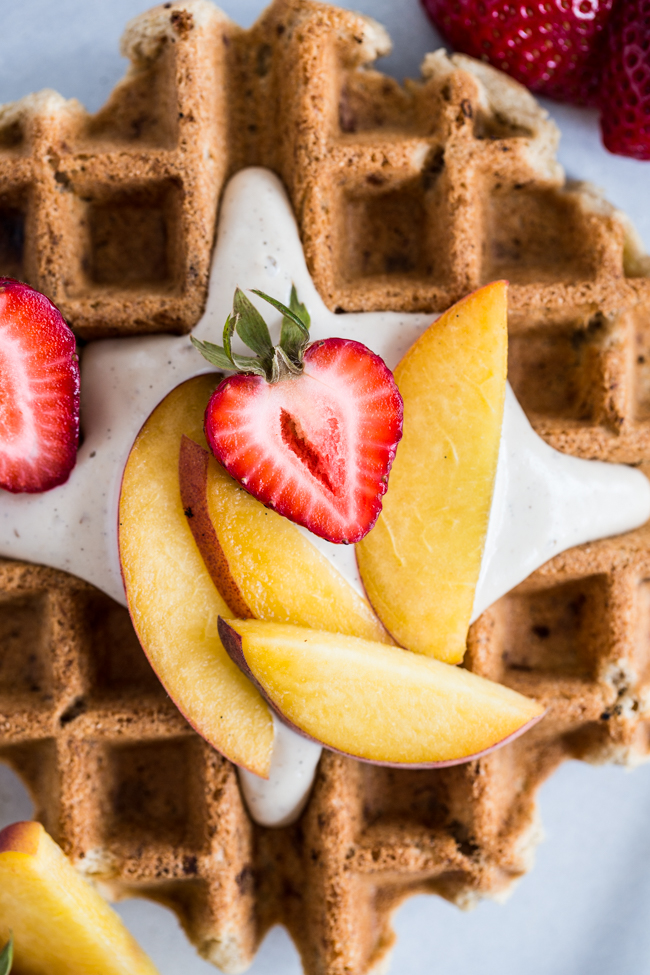
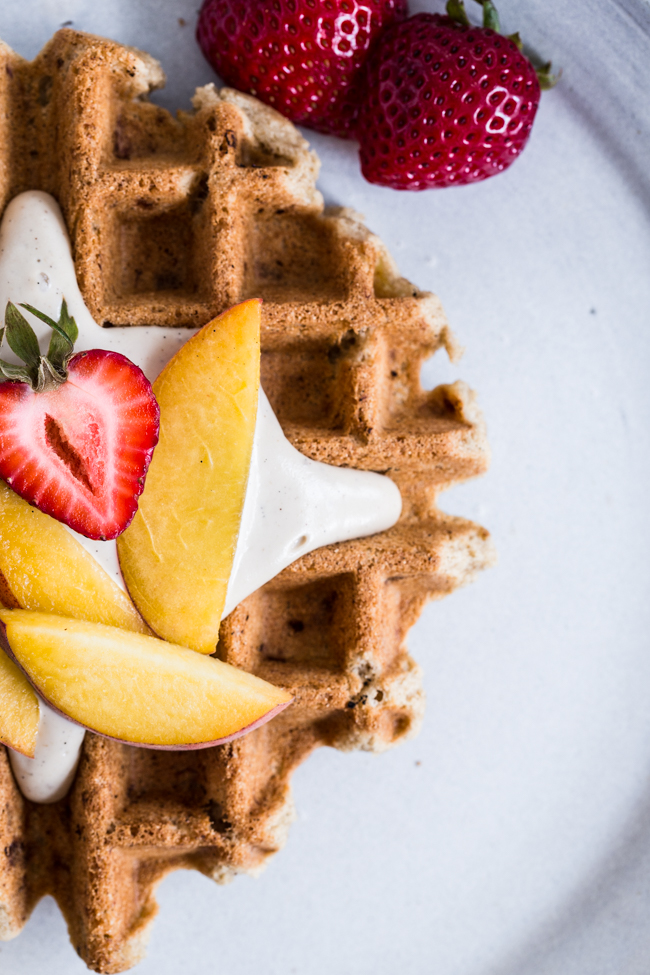
Now let's move on to the vanilla maple cashew cream. Actually, I think the photos of the cream will tell you everything you need to know. Only thing you have left to do is start cooking. Seriously, get on it right now.

Vegan Vanilla Waffles with Vanilla Maple Cashew Cream | Edible Perspective

(whisked aquafaba below)

Vegan Vanilla Waffles with Vanilla Maple Cashew Cream | Edible Perspective

Print Recipe!

Vegan Vanilla Waffles with Vanilla Maple Cashew Cream

gluten-free, vegan // yields 2, 6-inch Belgium waffles

vegan vanilla waffles:

  • 1/2 cup gluten-free oat flour
  • 1/4 cup + 2 tablespoons sorghum flour
  • 2 tablespoons almond flour
  • 1/2 teaspoon baking powder
  • few dashes of cinnamon
  • 1/3 cup well-mashed, ripe banana
  • 2 tablespoons unsweetened vanilla almond milk (or milk of choosing)
  • 2 tablespoons melted, unrefined coconut oil
  • 2 teaspoons pure vanilla extract
  • 1/2 vanilla bean pod, seeds scraped
  • 1/4 cup + 2 tablespoons aquafaba (drained liquid from canned or boxed chickpeas)

vanilla maple cashew cream:

  • 1 cup raw cashews, soaked overnight
  • 1 1/2 inches vanilla bean (cut to size, but not scraped)
  • 6-10 tablespoons unsweetened vanilla almond milk
  • 2-4 tablespoons maple syrup
  • pinch of fine grain sea salt

Preheat your waffle maker to medium.

Mix together flours, baking powder, and cinnamon. In the bowl you mashed your banana in, add the milk, oil, vanilla, and vanilla beans. Mix together well. Add the wet to the dry and stir a few times. (It will still be very dry.)

In another bowl, rapidly whisk the aquafaba until very foamy on top. Pour over the flour mixture and gently stir until fully combined. (The batter will be thick and slowly pourable. It should not be runny.)

Thoroughly coat your waffle iron with cooking spray.

Pour half the batter in the center of your waffle iron and clamp down. Cook for 1 - 1 1/2 cycles. (1 1/2 cycles works best for my waffle maker to have crispy edges and a tender but cooked interior.) Carefully remove the waffle, coat with oil again, and cook the next waffle. 

While the waffles are cooking, place cashew cream ingredients in your blender. Start with 6tbsp milk + 2tbsp maple. Turn on and work to high until fully smooth (about 30-60 second). Add more milk to thin out and maple to sweeten as needed. Mixture will thicken as it sits.


Notes:

  • Sub other flours at your own risk.
  • I've found cooking spray to work the best to coat the waffle iron, as opposed to brushing on oil. With vegan and especially vegan/GF waffles, this is an absolute necessity to prevent sticking and the waffle pulling apart.
  • If your vanilla bean seems dried out, cut the 1 1/2-inch piece and let it soak with your cashews overnight.
  • For a quick-soak method for the cashews, place cashews in a small pot and cover with water. Bring to a boil, remove from the heat, and cover with a tight fitting lid. Let soak for 1 hour. You can also add the vanilla bean to this when you remove from the heat.
  • I used 3 tablespoons maple and just over 1/2 cup milk for the cashew cream, for a lightly sweetened and fairly thick mixture.


Vegan Vanilla Waffles with Vanilla Maple Cashew Cream | Edible Perspective

I hope these are your new, forever waffles, too.

Enjoy!

Ashley

Today's post is sponsored by Frontier Co-op, and I received compensation for writing this post. Opinions are always my own. If I didn't love it, you wouldn't hear about it. Thanks for your continued support!

Roasted Cherry Lavender Ice Cream

I haven’t forgotten about you!  It seems like a month has gone by since my last post. Even my dad was like, “Is something wrong with your blog? Every time I check it’s the same smoothie.” Ha. Yikes.  The majorly good news is I haven’t fallen off the face of the earth, I’ve just had a LOT of freelance photography work lately. Hooray!

The other good news is, today I’m sharing a recipe for roasted cherry lavender ice cream!

This post is sponsored by Frontier Co-op.

Roasted Cherry Lavender Ice Cream recipe with sweet cherries | Edible Perspective

It’s officially summer and we’re finally drying up from 1.5 months of insane amounts of rain for Colorado.

The fruits + veggies are starting to pile up at the farmers’ market and I’m taking full advantage. Cherries made an early appearance at the Boulder Farmers’ Market this year, and I pounced when I saw them. I knew they would be the perfect seasonal, local ingredient to feature as part of the Spice Up Summer campaign with Frontier Co-op. I’ve been working with Frontier on coming up with different ways to use dried herbs + spices with summer produce. You may have seen some of my ideas on Instagram. I also recently took over their Instagram account to highlight my early summer findings at the market. If you missed it, be sure and check it out starting with this photo. I had such a fun day exploring the market and talking to the farmers.

Roasted Cherries for Roasted Cherry Lavender Ice Cream | Edible Perspective

It took me awhile to think about how I would use cherries and what flavor profile I wanted to achieve. I went back and forth on sweet and savory ideas but had ice cream on the brain and just couldn’t shake it. Cherry ice cream sounded divine.

As much as I love eating raw cherries, I don’t really enjoy large pieces of fruit in my ice cream. So raw cherries weren't happening in this recipe. I also knew I didn’t want to make a solid cherry ice cream. I was imagining ribbons of roasted cherry puree, sliding between the layers of creamy, vanilla bean ice cream. And then I remembered this blackberry lavender ice cream I had a few years ago and obsessed over.

My mind was made up! I would pair the cherries with lavender and a base of vanilla bean ice cream.

Dried Lavender Buds for Roasted Cherry Lavender Ice Cream | Edible Perspective

I could almost taste how well the lavender was going to pair with the roasted cherry and vanilla flavors. It’s much smoother than you might imagine, and I promise it doesn’t taste like you’re eating soap or a lavender-scented candle.

Vanilla Ice Cream base for Roasted Cherry Lavender Ice Cream | Edible Perspective

Plus, lavender is known for its calming affects, so eating this ice cream will totally put you in a zen state of mind.

Roasted Cherry Lavender Ice Cream summer recipe | Edible Perspective

You can typically find dried lavender buds in the bulk spice section of your grocery store. If you can’t find them in store, they’re available online as well. Just make sure you’re buying food-grade quality. And if you have to buy in a large quantity, there are many other uses for dried lavender, so they definitely won’t go to waste!

Roasted Cherry Lavender Ice Cream recipe | Edible Perspective

Making this ice cream will involve some time, but the end result is absolutely worth it. It melts in your mouth with just the right amount of cherry sweetness and lavender essence.

Roasted Cherry Lavender Ice Cream with vanilla beans | Edible Perspective
Roasted Cherry Lavender Ice Cream | Edible Perspective

What are you waiting for?

Time to dig in.

Roasted Cherry Lavender Ice Cream with dried lavender + local cherries | Edible Perspective

Print Recipe!

Roasted Cherry Lavender Ice Cream 

gluten-free // yields appx. 4 servings

  • 2 cups pitted + halved sweet cherries
  • 2 tablespoon pure cane sugar
  • 2 cups whole milk, divided
  • 1 tablespoon + 1 teaspoon arrowroot starch
  • 3 1/2 tablespoons full-fat cream cheese, softened
  • 1/8 teaspoon fine sea salt
  • 1 1/4 cups heavy cream
  • 2/3 cup pure cane sugar
  • 1/4 cup dried lavender buds
  • 2 tablespoons honey
  • 1-2 vanilla beans, split + scraped, pods reserved (about 1/4 teaspoon beans)

*Pre-freeze your ice cream maker bowl according to manufacturer's instructions. I keep mine stored in the freezer so it's always ready.

Preheat your oven to 450° F. 

Place pitted cherries in a baking dish and toss with sugar. Roast for 15-20 minutes until cherries have softened and are starting to caramelize. Stir halfway through.

While roasting, prepare an ice bath in a large mixing bowl. Remove cherries from the oven and let cool for 15-20 minutes. After cooling, place in your blender (optional) and pulse to desired consistency for stirring into your ice cream. Pour into a quart-sized freezer bag, squeeze the air out, and seal. Place in the ice bath to fully chill.

While cherries are roasting, whisk 2-3 tablespoons of milk (from the 2 cups) in a small bowl with the starch until well combined. In a med/large mixing bowl, hip the cream cheese and salt together until smooth. Set both aside.

In a large pot, add the remaining milk, cream, sugar, lavender, honey, scraped beans, and vanilla bean pods. Place over medium-high heat and bring to a boil. Boil for 4 minutes, stirring occasionally. Remove from the heat and whisk in the starch mixture. Place back on medium-high heat and stir with a heat-safe spatula until just starting to thicken, 1-2 minutes. Remove from the heat. Remove vanilla bean pod(s).

In about 4 increments, whisk the milk mixture into the cream cheese bowl until smooth. Pour through a fine mesh strainer over another large bowl to strain the lavender buds. Pour into a gallon-sized freezer back, squeeze the air out, and seal. Place in the ice bath until fully chilled. About 30-60 minutes.  

Pour the milk mixture into your ice cream maker and let spin until thick like soft serve ice cream. Refer to manual for timing details. Once finished, pour in the cherry mixture and fold in a few times. Scoop into a freezer-safe, airtight storage container and pack down. Press parchment paper directly on top of the ice cream and seal with the lid. Let freeze for 4+ hours before serving.

Notes:

  • If you do not have an ice cream maker, check out this post for ideas on how to freeze your ice cream.

Lavender infusion adapted from: Jessica’s White Chocolate Lavender Ice Cream
Ice cream adapted from: Jenis Splendid  Ice Creams At Home, Ugandan Vanilla Bean Ice Cream pg. 148-149 

Roasted Cherry Lavender Ice Cream recipe for summer | Edible Perspective

I’m curious to hear what interesting herbs + spices have you been adding to your summer produce lately! Be sure to share your creations with the hashtag #SpiceUpSummer and tag @edibleASH and @frontiercoop !

Also! Be on the lookout for TWO recipes in one week over here and another use for your summer cherries. Ohhh yaaah.

Ashley

This post is sponsored by Frontier Co-op. All opinions are my own. If I didn't love it, you wouldn't hear about it. Thanks for supporting the brands that support Edible Perspective!