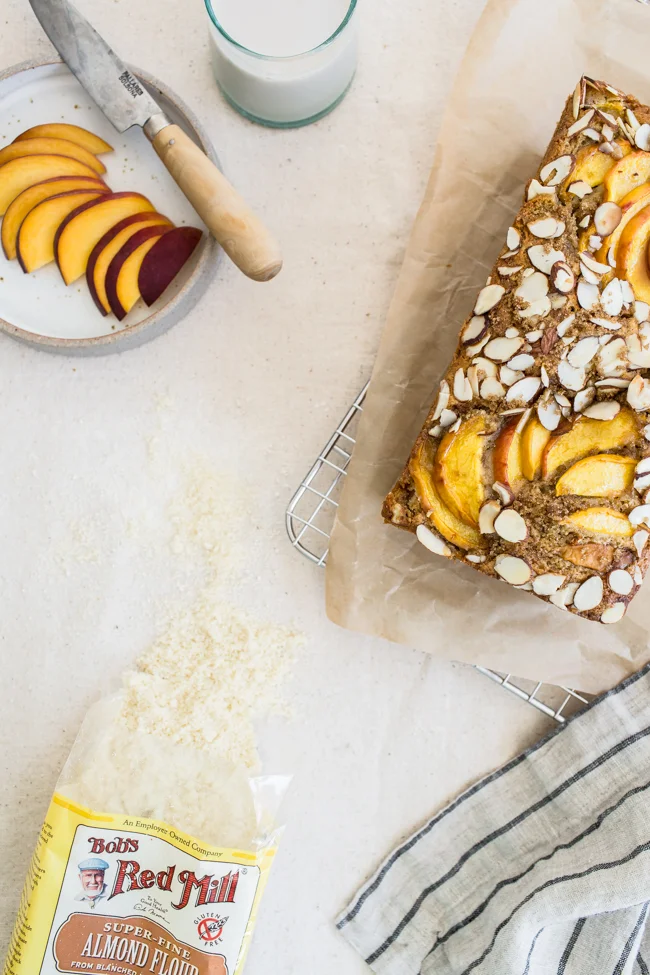
Peach Almond Bread

Peach Almond Quick Bread | Edible Perspective

This post is sponsored by Bob's Red Mill.

Ohhhhh, peach almond bread.... You gave me a run for my money. I was |thisclose| to giving up on you. But thankfully, on Friday at 4pm, I conquered you and then stuffed my belly full of your peachy, bready goodness. After the photo shoot, of course.

But who am I kidding? I stuffed my belly full during the failed attempts as well. And in all seriousness (this is really serious stuff), this was one of the hardest baked recipes I've ever tried to tackle. There are similar recipes in the archives, but once you throw fresh, juicy fruit in the mix, it changes everything. I was really striving for a dense, but moist, but sturdy loaf. So many of the trials just didn't want to fully bake and were wet in the center. I think it had something to do with the peaches on top, which in a few attempts the peaches were caving in to the loaf after coming out of the oven. In one attempt, I tried adding an extra egg, but that led (I just typed "legg") a noticeable eggy flavor. And no one wants and egg-loaf!

My go-to baking mix as of this year is a mix of oat flour, sorghum flour, and almond flour. I used to use buckwheat instead of sorghum, but I wanted the more subtle flavor of sorghum flour in this loaf. I've found they bake very similarly, at least in my tests so far. I also chose almond flour instead of almond meal for a lighter texture and color. Almond meal contains the ground skins of raw almonds as well as the almonds, whereas almond flour is ground from blanched almonds. I love adding almond flour to my baked goods because it lends moisture and a delicate, soft texture to baked goods (due to the fat content). 

It's so convenient that you can go to most grocery stores now (not just natural food stores) and find the eye-catching display of Bob's Red Mill flours in the baking aisle. I feel like they've really changed the flour-game and offer so many options for gluten-free and gluten-filled bakers. They've been my favorite flour (and grain) supplier for awhile now, and a large part of that is because of the variety they offer, and of course, the quality. I've been using BRM flours for years + years now (hello, doughnut cookbook!), so it only made sense that I'd partner up with them this year to show you all just how much I love them. 

Don't forget to read the notes under the recipe, which will help guarantee your baking success!

Peach Almond Quick Bread | Edible Perspective

Print Recipe!

adapted from my: banana bread + triple chocolate quick bread

Peach Almond Bread

gluten-free/dairy-free, yields 1, 8x4/9x5 loaf

  • 3 medium peaches (just starting to ripen and slightly soft to the touch)
  • 1 cup gluten-free oat flour
  • 3/4 cup sorghum flour
  • 3/4 cup almond flour
  • 1 tablespoon ground flax meal
  • 1 1/2 teaspoons baking powder
  • 1/2 teaspoon salt
  • 1/2 cup lightly packed muscovado sugar (or brown sugar), plus 1 tablespoon for dusting
  • 2 large eggs
  • 1/3 cup unsweetened almond milk (or soy/whole milk)
  • 1/3 cup applesauce 
  • 3 tablespoons refined avocado oil (or other baking oil)
  • 1 tablespoon pure vanilla extract
  • 3/4 teaspoon almond extract
  • sliced almonds, to top

Preheat your oven to 350° F. Place one strip of parchment in an 8x4 or 9x5 pan that overhangs the wide sides of the pan. Grease the short ends of the pan. 

Dice 1-2 of the unpeeled peaches into 1/4-inch cubes and measure 3/4 cup. Take another peach and cut 4 large pieces around the pit. Place cut side down and make about 16, 1/8-inch slices (no larger). 

In a large bowl whisk together the flours, flax, baking powder, salt, and sugar. Set aside.

In another bowl, whisk the eggs until the whites are completely dispersed (30sec). Whisk in the milk, applesauce, oil, vanilla, and almond extracts. Pour the wet into the dry and stir until you no longer see dry flour. (Batter will be thick.)

Fold in the diced peaches until evenly dispersed. Pour/scrape batter into your loaf pan and spread evenly. Place sliced peaches in 2 pinwheel patterns, trying not to overlap the peaches too much. Make sure to leave open space on top of the loaf. Sprinkle almonds in open areas and then dust the top of the loaf with about 1 tablespoon muscovado sugar.

Bake for 55-65 minutes (9x5 may take slightly less time) in the center rack of your oven. Toothpick test for doneness. You want the toothpick to be slightly moist (not fully dry or sticky). Let cool in the pan for at least 30 minutes, then carefully pick up by the overhanging parchment and let fully cool on a wire rack. Once cooled, gently slice with a sharp bread knife on a cutting board. Loaf holds together best once fully cooled. 

Keep stored in a sealed container at room temp (or in the fridge) for about 4 days.


Notes:

  • Sub flours at your own risk. 
  • Do not sub flax-eggs for the eggs.
  • Avoid adding more than 3/4 cup diced peaches to the bread or it will have a hard time cooking through.
  • If peaches are too ripe, they will not allow your loaf to cook properly. If peaches are rock hard, they won't have much flavor.
  • Avoid fully covering the top of your loaf with sliced peaches.
  • Melted coconut oil will work in this recipe. Best if other wet ingredients are at room temp when you whisk in the coconut oil.
Peach Almond Quick Bread | Edible Perspective

Summer isn't over until you've eaten at least 2 dozen peaches and made this loaf. Plenty of time left!

Thank you for all the LOVE on my last post. You are all the best! Happy Wednesday!

Ashley

Today's post is sponsored by Bob's Red Mill, and I received compensation + product for writing this piece. Opinions are always my own. If I didn't love it, you wouldn't hear about it. Thanks for your continued support!

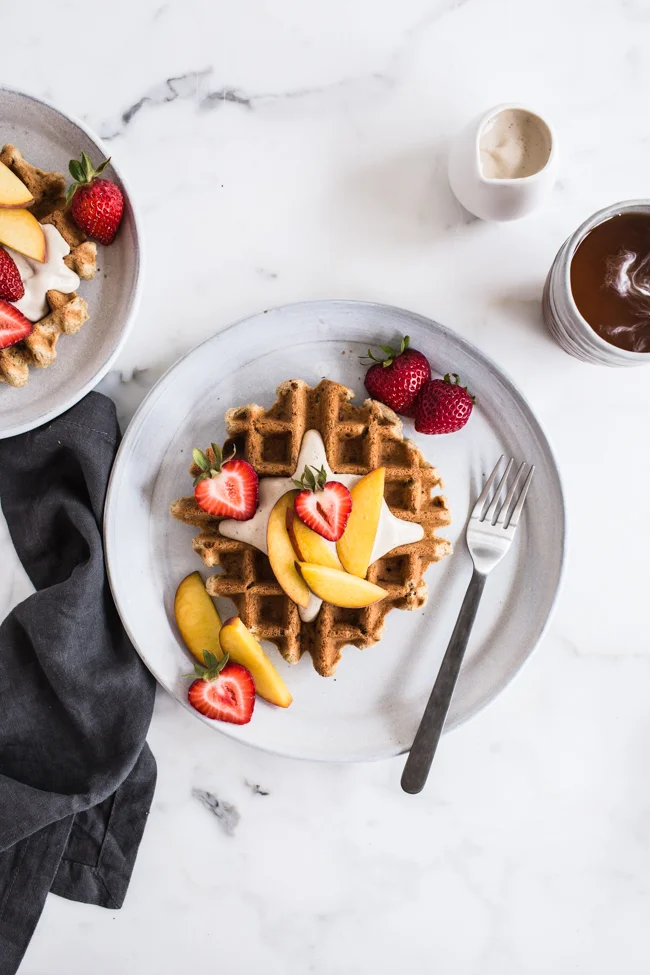
Vegan Vanilla Waffles with Vanilla Maple Cashew Cream

Vegan Vanilla Waffles with Vanilla Maple Cashew Cream | Edible Perspective

This post is sponsored by Frontier Co-op.

If you follow me on snapchat (@edibleash...yes, I'm obsessed and also 32), then you may have seen my 10+ failed attempts at this vegan vanilla waffle. Vegan waffles are not the easiest things to make, especially when you throw non-glutinous flours in the mix. But, I was determined and am so glad I stuck it out. Because now, I think I just may have my new, forever, morning waffle.

I can usually tell when a recipe is doomed after the first try or two. But I knew this waffle had potential from the beginning. The main problem was, it just wouldn't hold together as I opened the waffle maker. The exterior was golden and crispy, the flavor was spot-on, it was made with nutrient dense flours, but it just wouldn't hold. So there I stood, trial after trial, scraping waffle bits out of every crevice of the waffle maker, eating most of them and pondering my next attempt. It drove me batty. But this persistence that sometimes comes over me when creating new recipes, is where I feel my true sense of purpose in the kitchen.

I jumped around from adding things like arrowroot starch, psyllium husks, and flax, hoping something would stick. Literally. While a few worked okay, the texture just wasn't what I was after. During these trials, I also started playing around with aquafaba, a new to me cooking ingredient. It sounds completely crazy, but aquafaba is simply the liquid inside of a can of beans (typically chickpeas or white bean liquid). You know, the stuff you drain away and never use! I recently heard this can be used as a vegan egg replacer and figured it was worth a shot to try. While I can't say it works just like an egg in this recipe, it definitely seemed to help keep this waffle together and maybe also help lend a crispier texture (not positive on that). I actually think it's more useful as an egg-white replacer, as it can literally be whisked into meringue....made of bean liquid...insane.

What I figured out to be the most crucial aspects to this recipe were, creating a thick but still pourable batter and thoroughly greasing your waffle iron with cooking spray. The aquafaba probably helped a bit, too. 

With a generous pour of Frontier Co-op's organic vanilla extract, a 1/2 scraped vanilla bean pod, and a few dashes of their cinnamon, this waffle has the perfect flavor profile. There's a little banana that sneaks in there as well, that adds sweetness, flavor, and moisture. 

Now let's move on to the vanilla maple cashew cream. Actually, I think the photos of the cream will tell you everything you need to know. Only thing you have left to do is start cooking. Seriously, get on it right now.

Vegan Vanilla Waffles with Vanilla Maple Cashew Cream | Edible Perspective

(whisked aquafaba below)

Vegan Vanilla Waffles with Vanilla Maple Cashew Cream | Edible Perspective

Print Recipe!

Vegan Vanilla Waffles with Vanilla Maple Cashew Cream

gluten-free, vegan // yields 2, 6-inch Belgium waffles

vegan vanilla waffles:

  • 1/2 cup gluten-free oat flour
  • 1/4 cup + 2 tablespoons sorghum flour
  • 2 tablespoons almond flour
  • 1/2 teaspoon baking powder
  • few dashes of cinnamon
  • 1/3 cup well-mashed, ripe banana
  • 2 tablespoons unsweetened vanilla almond milk (or milk of choosing)
  • 2 tablespoons melted, unrefined coconut oil
  • 2 teaspoons pure vanilla extract
  • 1/2 vanilla bean pod, seeds scraped
  • 1/4 cup + 2 tablespoons aquafaba (drained liquid from canned or boxed chickpeas)

vanilla maple cashew cream:

  • 1 cup raw cashews, soaked overnight
  • 1 1/2 inches vanilla bean (cut to size, but not scraped)
  • 6-10 tablespoons unsweetened vanilla almond milk
  • 2-4 tablespoons maple syrup
  • pinch of fine grain sea salt

Preheat your waffle maker to medium.

Mix together flours, baking powder, and cinnamon. In the bowl you mashed your banana in, add the milk, oil, vanilla, and vanilla beans. Mix together well. Add the wet to the dry and stir a few times. (It will still be very dry.)

In another bowl, rapidly whisk the aquafaba until very foamy on top. Pour over the flour mixture and gently stir until fully combined. (The batter will be thick and slowly pourable. It should not be runny.)

Thoroughly coat your waffle iron with cooking spray.

Pour half the batter in the center of your waffle iron and clamp down. Cook for 1 - 1 1/2 cycles. (1 1/2 cycles works best for my waffle maker to have crispy edges and a tender but cooked interior.) Carefully remove the waffle, coat with oil again, and cook the next waffle. 

While the waffles are cooking, place cashew cream ingredients in your blender. Start with 6tbsp milk + 2tbsp maple. Turn on and work to high until fully smooth (about 30-60 second). Add more milk to thin out and maple to sweeten as needed. Mixture will thicken as it sits.


Notes:

  • Sub other flours at your own risk.
  • I've found cooking spray to work the best to coat the waffle iron, as opposed to brushing on oil. With vegan and especially vegan/GF waffles, this is an absolute necessity to prevent sticking and the waffle pulling apart.
  • If your vanilla bean seems dried out, cut the 1 1/2-inch piece and let it soak with your cashews overnight.
  • For a quick-soak method for the cashews, place cashews in a small pot and cover with water. Bring to a boil, remove from the heat, and cover with a tight fitting lid. Let soak for 1 hour. You can also add the vanilla bean to this when you remove from the heat.
  • I used 3 tablespoons maple and just over 1/2 cup milk for the cashew cream, for a lightly sweetened and fairly thick mixture.


Vegan Vanilla Waffles with Vanilla Maple Cashew Cream | Edible Perspective

I hope these are your new, forever waffles, too.

Enjoy!

Ashley

Today's post is sponsored by Frontier Co-op, and I received compensation for writing this post. Opinions are always my own. If I didn't love it, you wouldn't hear about it. Thanks for your continued support!