Oatmeal Cookie Tarts with Vanilla Bean Cream Filling

Oatmeal Cookie Tarts with Vanilla Bean Cream Filling (vegan + GF) | edibleperspective.com

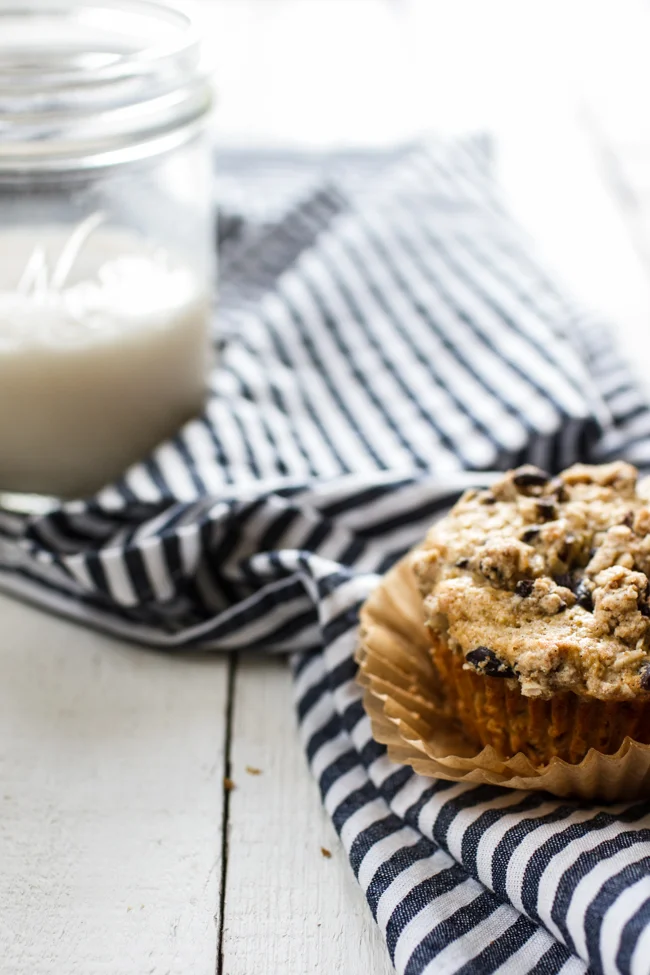
This is the first cookie I've made so far this winter and it's not even 100% a cookie! How is this possible!? I'm pretty sure next week is going to be filled with endless stacks of cookies, sugar coated counters, and an oven that's on for days.

But before I go into total cookie-bake-mode over here, I busted out something a little fancy to line your dessert table with this year. These Oatmeal Cookie Tarts with Vanilla Bean Cream Filling are pretty much all of my favorite dessert flavors + textures packed into a 2-bite treat.

Vanilla + oat lover 4 life.

This post is sponsored by Rodelle.

Oatmeal Cookie Tarts | edibleperspective.com

The other day, I tried making no-bake pecan tart crusts in a mini muffin pan. Total fail. They may look okay in this photo but they were pretty much a hot mess. After 10 minutes sitting out at room temp they would turn crumbly in your hand. The dough was also difficult to work with and it ended up being too soft paired with the vanilla cream filling. I'm sure I could have tested the pecan dough 17 more times to get it right, but I had another idea in mind.

Oatmeal cookie tart shells!

Vegan + Gluten-free Oatmeal Cookie Tart recipe | edibleperspective.com

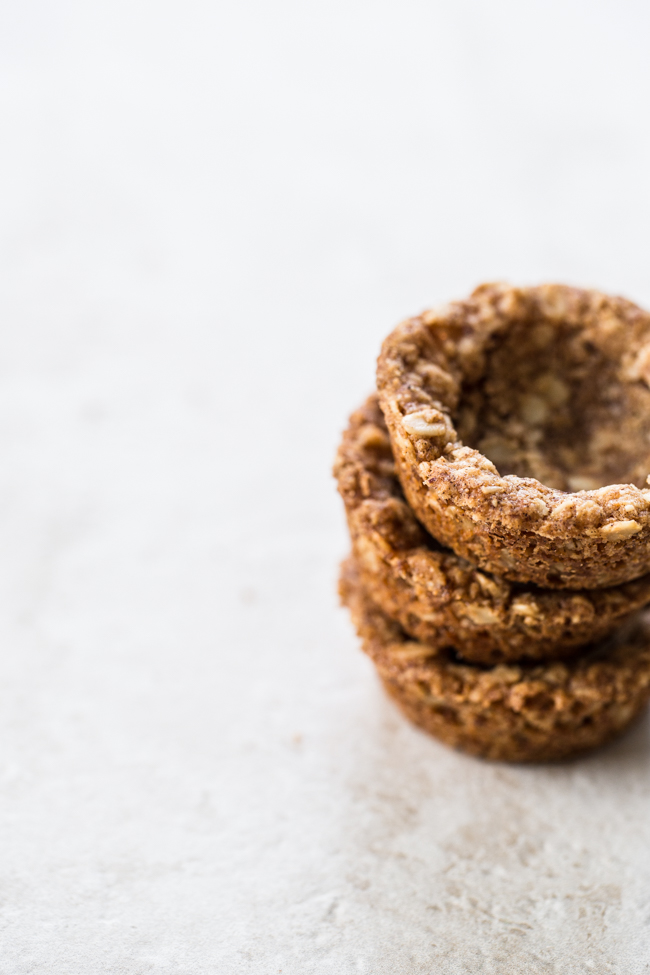
I remembered my vegan deep dish oatmeal cookie recipe from a few years ago and thought it might be the perfect dough to make a tart shell from. It's a little bit chewy, very sturdy, and doesn't have an overpowering flavor. I really wanted the vanilla cream filling to shine, so this oatmeal cookie crust is the perfect little nest to house that insanely delicious filling. I made a few tweaks, pressed the dough into the pan, and triple crossed my fingers while they were in the oven.

I had a mild panic attack when I pulled them out of the oven because they puffed all the way up to the top of the pan! However, this was quickly remedied with the back of a small spoon and 30 seconds of my time. Phew.

Oatmeal Cookie Tarts filled with Vanilla Bean Cream (vegan + gf) | edibleperpsective.com

The filling was also a bit trickier than I anticipated. I didn't want to go fully cashew-based and coconut cream wasn't the direction I wanted to go in, either. The answer? A mix of silken tofu and cashews and loads of vanilla beans

I used to be freaked out about using tofu in desserts. It definitely seems a little hippy-dip, out there. But once you see how easy this cream filling is to make and get your first taste, I can guarantee you'll be on board.

Just make sure you're using the silken (and firm) variety!

Oatmeal Cookie Tarts with Vanilla Bean Cream Filling recipe | edibleperspective.com

Creamy vanilla.

Chewy oatmeal cookie.

Sweet, juicy raspberry.

Kissed with chocolate shavings on top.

Oy.

You'll probably have a little cream filling leftover after filling the shells, but I promise you won't mind. Spoon to face.

Oatmeal Cookie Tarts with Vanilla Bean Cream Filling both gluten-free + vegan | edibleperspective.com

Print Recipe!

tart shells adapted from my vegan deep dish cookie // cream filling adapted from Kathy

Oatmeal Cookie Tarts with Vanilla Bean Cream Filling 

gluten-free, vegan // yields: 24 mini tarts

for the vanilla bean cream:

  • 3/4 cup raw cashews, soaked (at least 4hrs) + drained
  • 3/4 cup packed silken-firm tofu
  • 6 tablespoons pure maple syrup (room temp)
  • 1 1/2 vanilla bean pods, seeds scraped
  • 1/8 teaspoon salt
  • 1/4 teaspoon cinnamon
  • 1/8 teaspoon almond extract
  • 3 tablespoons melted unrefined coconut oil

for the tart shells:

  • 1 1/2 cups gluten-free rolled oats
  • 1/2 cup gluten-free oat flour
  • 1/2 cup almond meal
  • 1/3 cup muscovado sugar (or coconut sugar)
  • 1 teaspoon cinnamon
  • 1 teaspoon baking powder
  • 1/2 teaspoon salt
  • 1/3 cup softened unrefined coconut oil (not melted)
  • 1/4 cup pure maple syrup (room temp)
  • 2 teaspoons pure vanilla extract
  • toppings: 24 raspberries, dark chocolate shavings

Place cashews, tofu, maple syrup, vanilla beans (scraped from pods), salt, cinnamon, and almond extract into your blender. Blend, working up to high power until creamy and smooth (30-60 seconds). Add the melted coconut oil and blend again until fully smooth. Pour into a sealable container and refrigerate until fully chilled and thickened (at least 4 hours).

Preheat your oven to 350° F. Grease a 24-mold mini muffin pan with softened coconut oil.

Place oats, flour, meal, sugar, cinnamon, baking powder, and salt in a large mixing bowl and stir to combine. Add the softened coconut oil, syrup, and vanilla. Start to combine with a large fork then use your hands to finish mixing the dough, making sure the coconut oil is evenly dispersed. The dough should be stiff and hold together well when pressed. 

Place just over 1 tablespoon of packed dough into each muffin cup. Press dough down to form the base and then work up the sides to create a thick edge all the way around (refer to photo 2). I used my thumb and pointer finger for this.

Bake for 8-11 minutes, until light golden brown (8 minutes for a chewier shell, 11 minutes for a crispier texture). Remove from the oven and gently press the center of each tart shell with the back of a small spoon while hot (I used the back of a rounded, 1 teaspoon measuring spoon). You want about a 3/4-inch deep pocket with 1/4-inch edge all the way around.

Allow to cool in the pan for 30 minutes, then gently press down on an edge to loosen and pop each tart shell out. Use a thin knife if needed. (Mine popped out very easily.) Fill the cups once fully cool. Top with a raspberry (patted dry after rinsing) and chocolate shavings and serve immediately. 

Notes:

You can make the cream filling 24 hours ahead. The cookie shells can also be made 1 day ahead. Keep covered after fully cooled. Fill tarts just before serving for the best taste. Refrigerate leftovers (they do hold up well overnight in the fridge).

The coconut oil adds a mild, coconut flavor. If you despise any coconut flavor at all, simply use refined coconut oil in it's place. Do not sub with any other other type of oil or butter.

Be sure to use firm-silken tofu for the creamiest texture. This type of tofu is found in the ethnic aisle of your store and is not refrigerated. It comes in a small cardboard box. 

To quick soak the cashews: Cover with water in a small pot then bring to a boil. Remove from heat and cover in the pot for 1 hour. Drain and rinse cashes with cold water.

I used Rodelle Madagascar Vanilla Beans and their organic Bourbon Pure Vanilla Extract in this recipe. 

Oatmeal Cookie Tarts perfect to be filled with any pie-type filling! | edibleperspective.com

Happy Friday, friends. I so hope you're enjoy this season!

Much love,

Ashley

Today's post is sponsored by Rodelle. Product opinions are always my own. If I didn't love it, you wouldn't hear about it. Thank you for your continued support over the years! It is truly appreciated.

Vanilla Muffins

Friday! Friday!

We're starting this Friday off right with vanilla muffins. Vanilla muffins that are so full of goodness I can hardly stand it. I would definitely call myself vanilla obsessed. It's one of my all-time favorite kitchen ingredients and plain as it may be, my favorite ice cream flavor. 

This post is sponsored by Rodelle. All products have been tested and approved by my taste buds. 

Vanilla Bean Crumb Muffins | Edible Perspective

A few months ago, I had the chance to meet some of the staff at Rodelle to learn everything there is to know about vanilla. Well, maybe not everything but a whole heck of a lot. I've been a long time fan of Rodelle's vanilla products, but I'm thrilled they reached out so I could learn even more. 

What stood out most to me was how they frequently visit the farms in Africa for more than just quality control of their product. While quality is very important, they focus much of their time and effort in making sure there are safe and sustainable working environments for the farmers. They also help support the communities as a whole by providing things like clean drinking water, safe cooking stoves, and with the microfinance program. Rodelle did not ask me to tell you any of this, but I was so impressed by their efforts and felt compelled to share. 

Vanilla Bean Crumb Muffins | Edible Perspective

While the vanilla beans I received from Rodelle were the most fragrant, sticky, and plump I've ever encountered (honestly), I wanted to see if steeping them in hot water would make it easier to scrape the seeds and result in a larger yield. This totally worked! No vanilla beans were left behind! It was nice to feel like no beans were going to waste. I'm sure it's especially helpful if your beans have dried out a bit.

Recently, I was also able to tour the factory in Ft. Collins to take photos for a freelance project. I cannot even describe the intensity of the vanilla aroma that takes over the entire facility. I obviously loved it.

Vanilla Bean Crumb Muffins | Edible Perspective

Have you ever made vanilla sugar before? I used muscovado sugar (it tastes like caramel sugar!) and followed Alton's simple instructions. As if my vanilla obsession wasn't bad enough.

I used the vanilla muscovado sugar as an alternative to the vanilla crumb topping for a few of the muffins. So good either way or with some of both! 

Vanilla Bean Crumb Muffins | Edible Perspective

I also learned something about crumb topping in my trials.  

If you melt the coconut oil (or butter in some crumb topping recipes) you'll achieve a chunkier topping like you see below. However, if you use softened coconut oil (or butter) it will result in more of a crust topping that spreads over the entire muffin. It seems like the opposite should happen as the dough with the softened coconut oil is much crumblier before baking. But for whatever sciency reason, the melted oil gives you that real-deal "crumb" look.

Moving on....

Vanilla Bean Crumb Muffins | Edible Perspective

And because I'm slightly strange and don't like crunchy things in my muffin but they're okay on top of my muffin, I've added cacao nibs to the crumb topping.

It provides a delicate crunch and slightly bitter, chocolaty bite to contrast all of that sweet vanilla flavor.

Vanilla Bean Crumb Muffins | Edible Perspective

Print Recipe!

Vanilla Muffins with Crumb Topping 

heavily adapted from my citrus poppy seed muffins (guest post on 80-twenty)
gluten-free // yields: 12 standard muffins

for the crumb toppings:

  • 3 tablespoons melted coconut oil
  • 1 teaspoon pure vanilla extract
  • 1/2 cup + 2 tablespoons gluten-free oat flour
  • 1/4 cup gluten-free rolled oats
  • 3 tablespoons muscovado sugar (or coconut sugar/sucanat)
  • pinch of salt
  • 3-4 tablespoons cacao bean nibs

for the muffins:

  • 1 cup gluten-free oat flour
  • 3/4 cup almond flour
  • 6 tablespoons muscovado sugar (or coconut sugar/sucanat)
  • 1/4 cup sorghum flour
  • 2 teaspoons baking powder
  • 1/2 teaspoon salt
  • 1/4 cup milk
  • 1/4 teaspoon packed vanilla beans, scraped from appx. 2 plump pods
  • 3 large eggs
  • 1/4 cup applesauce
  • 1 tablespoon pure vanilla extract
  • 1/4 cup melted unrefined coconut oil (lightly cooled)

Preheat oven to 350° F. 

Pour the coconut oil for the crumb topping in a small mixing bowl. Add the vanilla extract and stir. Then add the oat flour, oats, sugar, and salt. Stir/mash with a fork until a cohesive dough forms, similar in consistency to a soft cookie dough. Mix in the cacao nibs. Set aside. 

Line a muffin tin with 12 liners.

In a large bowl stir the oat flour, almond flour, sugar, sorghum flour, baking powder, and salt until well combined.

In another bowl, briskly whisk the milk and vanilla beans together until the beans are evenly distributed. Add in the eggs, applesauce, and vanilla extract and whisk until well combined. Whisk in the oil and then immediately pour into the dry bowl. Stir until you no longer see dry flour.

Scoop into the muffin liners, filling about 3/4 of the way to the top. Break up the crumble topping and sprinkle over top of the muffins. Quickly place in the oven and bake for 17-22 minutes, until the edges are light golden brown and a toothpick comes out nearly clean. You want the toothpick slightly sticky (but not gooey). Let cool for 10 minutes in the pan and then transfer to a cooling rack. Allow to cool for at least more 20 minutes before serving.


Notes:

  • I used Rodelle's Pure Madagascar Vanilla Extract and Madagascar Vanilla Beans in this recipe.
  • To get the most from your vanilla beans, steep them in hot water for about 10 minutes. Then, blot dry, trim the ends with a pairing knife, slice down the center (through the top layer only), and scrape the entire inside of the pod with the dull side of your knife.
  • I do not recommend subbing any flours. However, for a stickier/denser muffin, use 1 cup oat flour and 1 cup almond flour and leave the sorghum flour out. The sorghum helps lend a fluffier texture.
  • If you don't have vanilla beans on hand: sub 2 tablespoons vanilla paste, or 2 tablespoons pure vanilla bean extract
  • In the crumb topping, feel free to add a small pinch of vanilla beans if desired. Or, instead of 1 teaspoon pure vanilla extract, sub 1 teaspoon vanilla paste.
  • If you want more of a crust on top of the muffin rather than a crumb topping, use 3 tablespoons softened unrefined coconut oil and reduce the oat flour to 1/2 cup. The dough will be crumbly.
Vanilla Bean Crumb Muffins | Edible Perspective

Happy weekending!

Ashley

This post was sponsored by Rodelle. Opinions are always my own and products are thoroughly tested before sharing. Thank you for supporting the occasional sponsored post that helps fund all the deliciousness you find here!