Lemon Garlic Tempeh with Turmeric Hemp Dressing

Lemon Garlic Tempeh with Turmeric Hemp Dressing | edibleperspective.com

This post is sponsored by Frontier Co-op.

As our diets started transitioning years ago, and we started to cook more from scratch and eating less meat (then eventually no meat), there were a few grocery store items that didn’t seem doable to make at home. Salad dressing was one of them, along with granola bars, cereal, hummus, and nut butter, just to name a few. It was something I never thought about, really, and it took me awhile to finally realize these items were more than feasible to make at home. And once I started experimenting with homemade dressing, it was like, GAME ON. I actually started to enjoy salads!

So when Frontier Co-op came to me and asked if I’d be willing to share how I Cook With Purpose, I knew homemade salad dressing was the perfect topic to start with. When I started making more things from scratch, I felt such accomplishment and also a bigger sense of purpose in the kitchen. I was no longer cooking to eat and be done. I was cooking for our health, for the enjoyment I felt, and because homemade food just tastes better.

I can’t think of one store-bought salad dressing I ever actually enjoyed. (Okay, maybe ranch as a kid.) Most bottled dressings use a multitude of cheap and highly processed oils like soybean, canola, safflower, etc. and rarely use actual cold-pressed olive oil. Making dressing at home might seem intimidating, but it can be as simple as whisking together lemon juice, olive oil, honey or maple syrup, salt + pepper. And half the time, I’ll squeeze lemon and drizzle olive oil right over my salad and call it a day.

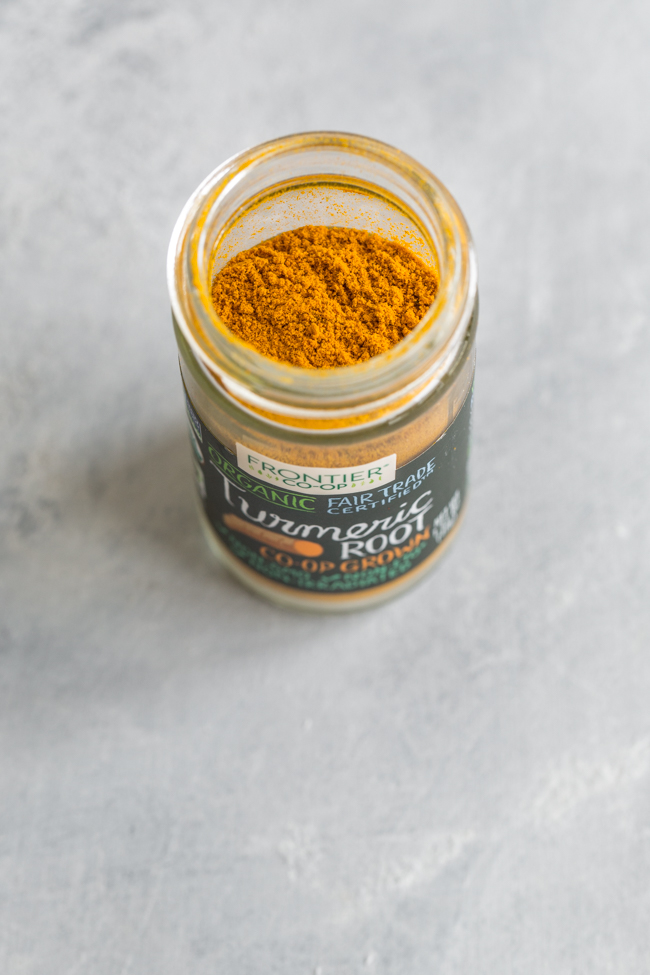
But there are times where I want dressing with a bit more depth that can hold up to a big bowl of greens, protein, and grains. I developed this dressing from my recent orange hemp salad dressing (still in love with that one) but kept this more on the savory side. I wanted to infuse the dressing with turmeric for its vibrant yellow color and light, earthy flavor. (Bonus: Frontier Co-op’s turmeric is sustainably grown by small farmers in Sri Lanka!) And instead of all hemp seeds I used a combination of hemp seeds and cashews, for an unbelievably creamy texture. Using turmeric alone fell a bit flat. But with a little more experimentation, I figured out that smoked paprika and cumin compliment turmeric extremely well. With a whole bunch of lemon and a clove of garlic added in, it couldn’t get much better.

Besides the dressing, I cooked a simple batch of quinoa, steamed broccoli, and pan-seared tempeh that can marinate on your counter for 30 minutes or in the fridge overnight. I urge you to make enough for leftovers the next day!

Lemon Garlic Tempeh with Turmeric Hemp Dressing | edibleperspective.com

Print Recipe!

Lemon Garlic Tempeh with Turmeric Hemp Dressing

gluten-free, vegan // yields: 3-4 servings

For the tempeh: adapted from The Full Helping

  • 3 tablespoons lemon juice
  • 2 tablespoons low sodium tamari
  • 1 tablespoon avocado oil
  • 2-3 teaspoons sriracha
  • 2 medium cloves garlic, finely grated (I use a microplane for this.)
  • 1 teaspoon turmeric
  • 1 1/2 teaspoons maple syrup
  • zest from 1 small-medium lemon (about 1 1/2 - 2 teaspoons)
  • 1/4 teaspoon freshly ground black pepper
  • 1, 8oz block tempeh (gluten-free if needed)
  • 1 tablespoon oil, for cooking

For the dressing:

  • 1/4 cup raw cashews (soaked overnight or at least 4hrs, then drained)
  • 1/3 - 1/2 cup water
  • 1/4 cup hulled hemp seeds
  • 3-4 tablespoons lemon juice
  • 1 tablespoon extra virgin olive oil
  • 1 1/2 teaspoons maple syrup
  • 1 1/2 teaspoons turmeric
  • 1 teaspoon cumin
  • 1/2 teaspoon smoked paprika
  • 1 medium clove garlic, peeled
  • 1/4 teaspoon salt + pepper

For the meal:

  • 2 large heads broccoli, chopped into florets
  • 1 cup uncooked quinoa, rinsed + drained
  • 1 1/4 cups water

Place tempeh marinade ingredients in an airtight storage container (medium size) and whisk to combine. Chop tempeh into 1/2 - 3/4 inch cubes and add to the marinade. Seal and gently shake to fully coat. Let sit on the counter for 30 minutes (up to 60 is fine), turning a few times. Or, refrigerate for 8-12 hours, turning a few times.

After about 15 minutes, add quinoa to a medium pot with the water and a big pinch of salt + pepper. Turn to high. Bring to a boil, then reduce heat to simmer and cover for 15 minutes. Quickly check to make sure water is fully absorbed by tilting the pot, then replace the cover and let sit for 10-15 minutes. Fluff with a fork before serving.

Meanwhile, add all dressing ingredients to your blender. Turn on working to high speed until fully smooth, 30-60 seconds. Taste and add more lemon or water if needed. Dressing will thicken as it sits. Whisk in more water to thin if needed. Store in a sealable jar in the fridge for about 5 days. Shake before using.

Set up a pot steam your broccoli. Then, heat a medium-large pan over medium heat with a swirl of oil. Once the pan is hot, add tempeh with the marinade and cook for about 4-5 minutes on one side, until deep golden. Add your broccoli to the simmering pot right after you add the tempeh to the pan. Flip tempeh and cook for another 3-5 minutes, until golden. Toss for 1-2 minutes, then turn off the heat. Broccoli should be finished in about 8-10 minutes. Test with a fork.

Plate quinoa with broccoli, tempeh, and dressing. Add salt, pepper, and sriracha if desired.


Notes:

  • If placing tempeh marinade in a plastic container, note that the turmeric may stain it. Turmeric will also stain clothing, towels, some types of counters, wood utensils, etc.
  • In the photo I also chopped some fresh chard, which you can do as well or leave out. Other greens will also work well.


Lemon Garlic Tempeh with Turmeric Hemp Dressing | edibleperspective.com

Don't forget to check out my live webcasts over on my Nom.com channel each week! You can still watch previous episodes and then sign up to tune in and chat with me live while I cook (or you can just watch and not sign up). My next episode is coming up this Friday. Stay tuned to Instagram + Snapchat: edibleash for more details!

Ashley

Today's post is sponsored by Frontier Co-op, and I received compensation for writing this post. Opinions are always my own. If I didn't love it, you wouldn't hear about it. Thanks for your continued support!

Vegetable Fried Rice

Vegetable fried rice has been a favorite dish of mine since I was a kid. Chowing down on a huge pile while dining out was always great, but the best thing was eating it straight out of the cardboard take-out container.

You totally know what I’m talking about.

Vegetable Fried Rice | edibleperspective.com

Today’s post is sponsored by Earthbound Farm. Product opinions are always my own. If I didn’t love it, you wouldn’t hear about it.Thank you for supporting the occasional sponsored post that helps fund all the deliciousness + behind the scenes action you see here.

I feel like fried rice is pretty tricky to recreate at home, and I’m not sure I’ll ever be able to truly create an authentic recipe. Similar to other ethnic food, I think it takes years of training or a grandma who’s been cooking for a million years to show you how it’s done.

Vegetable Fried Rice | edibleperspective.com

However, this vegetable fried rice is about as close as I’ve ever come to the real thing. It’s simply flavored and doesn’t take long to throw together. The key is you must cook the rice ahead of time and let it chill for at least 1 night in the fridge. Using just-cooked rice is seriously disappointing. Trust me.

Vegetable Fried Rice | edibleperspective.com

Lately I’ve been loving veggie-packed meals that come together in under 30 minutes and are easy to shop for. I mean, who doesn’t love a good quick and simple meal? With prep and cook time I’d say you could get this finished in 25 minutes, and you’ll even have leftovers for lunch the next day. Not too shabby.

Vegetable Fried Rice | edibleperspective.com

I almost always have all of these ingredients on hand each week, but in case you don’t, you can always make substitutions with other vegetables you have in the fridge. It’s a great “pantry” meal with the mix of fresh and frozen ingredients that I’ve used.

And while “fried” is in the title of this recipe and the rice does sort of get fried, it’s actually a super healthy meal. I’ve loaded this with some of my favorite vegetables like Earthbound Farm’s frozen peas, fresh broccoli, and carrots. I just love the vibrancy and texture that those vegetables add.

Vegetable Fried Rice | edibleperspective.com

For an added kick of protein I’ve also added shelled edamame. And for a little pop of juice and sweetness I added frozen mango. You may be familiar with adding pineapple to fried rice and other Asian dishes, but I thought I’d switch things up today with mango. It was a welcome change!

This is the type of comforting winter meal I adore and it totally sticks to your ribs.

You’ll see in the instructions that you combine the rice and vegetables together in 2 batches. I know that sounds annoying but it really helps keep the rice from turning mushy and the veggies from going limp. Using a large wok or your largest pan possible also helps!

Vegetable Fried Rice | edibleperspective.com

Print Recipe!

adapted from: the Thug Kitchen cookbook

Vegetable Fried Rice

gluten-free, vegan // yields 3-4 large servings

  • 2 1/2 tablespoons refined avocado oil (or other high-heat cooking oil)
  • 2 cups EBF broccoli, chopped into florets
  • 2 1/2 tablespoons gluten-free tamari
  • 1 1/2 tablespoons rice vinegar (or white wine vinegar)
  • 2 teaspoons sriracha
  • 1/2 cup diced yellow onion
  • 1 large EBF carrot, chopped
  • 2 cloves garlic, minced
  • 2-3 teaspoons grated ginger
  • 1 cup EBF frozen peas, thawed
  • 1/2 cup shelled edamame, thawed
  • 4 cups pre-cooked short grain brown rice (chilled for at least 8 hours after cooking)
  • 1 cup EBF frozen mango, thawed and chopped
  • 1/2 cup sliced EBF green onion

Place about 2 teaspoons of oil in a wok or large skillet over medium heat. Once hot, add the broccoli and cook until vibrant green, about 4-5 minutes. Toss every minute or so.

While the broccoli cooks stir together the tamari, rice vinegar, and sriracha. Set aside.

Add the onion and carrot to the broccoli and cook until starting to soften, about 4-5 minutes. Stir every minute or so. Add the garlic and ginger and cook for 30 seconds - 1 minute, stirring constantly.

Add the thawed peas and edamame and cook for 1 minute. Stir a few times. Remove mixture from the wok onto a large plate or baking sheet. Wipe out the pan.

(Have all of your ingredients ready as the next part moves quickly over high heat to avoid soggy rice.)

Set the wok (or large pan) over high heat and add 1 tablespoon of oil. Once hot, add 2 cups of the rice and let fry for about 1 minute (very hot! watch for spattering), tossing a few times. Pour half of the sauce on top. Toss to combine and let cook for about 30 seconds, stirring 2-3 times (you want some of the sauce to soak in, but you don’t want the pan to dry up). Add 1/2 of the veggies back to the pan along with 1/2 of the mango and 2-3 tablespoons of green onion. Cook for about 1 minute until well combined and hot.

Serve hot and top with sriracha, tamari, green onion, sesame seeds, etc. Repeat the same process above with remaining rice and vegetables.

Let cool before storing in a sealed container in the fridge for up to 4 days.

----

Notes:

  • It’s very important to use a wok/pan over high heat with high-heat oil. If you don’t do this, the rice will turn mushy. Also, cooking in 2 stages prevents the rice from becoming mushy as well.
  • Thaw and drain your peas and edamame. No boiling is required. Just toss them in the pan as directed.
  • It is crucial to use rice that is chilled and has been pre-cooked, or you’ll end up with soft, mushy fried rice.
  • Long + medium grain rice also works well and will have less stickiness and a more toothsome bite.
  • scant 1 1/4 cups uncooked short grain brown rice = appx. 4 cups cooked
Vegetable Fried Rice | edibleperspective.com

One of the best combination of ingredients ever. I will forever be a fried rice lover.

Ashley