Classic Buttermilk Baked Doughnuts with Chocolate + Vanilla Glaze
/Today I’m taking a few steps back with Doughnut Week to show you the baked doughnut basics. Maybe you’re new to baked doughnuts? Maybe you’re still on the fence about baking, not frying a doughnut? My hope is that by the end of this post you’ll see that it’s actually a pretty easy—and super tasty—process.
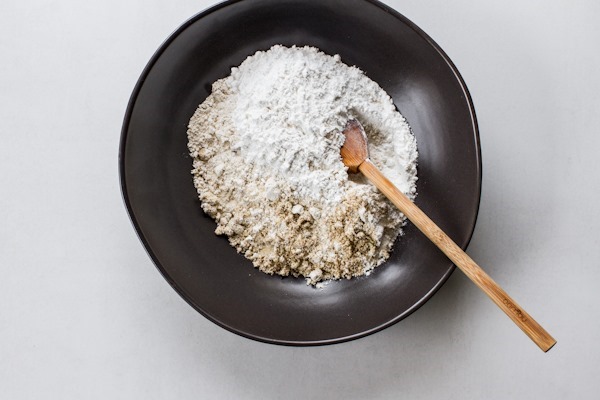
First things first. Let’s stir the dry ingredients together. We’re using a combination of oat flour, sweet rice flour, and almond meal. Don’t let these non-traditional flours scare you. Oat flour and almond meal are really easy to find or make at home. Sweet rice flour can be found online and in some natural food stores but is most easily found in Asian markets which you probably have closer to you than you think! I recently found sweet rice flour at an Asian market for 1/4 of the price! [fyi – it may also be called “glutinous rice flour”]
This particular combination of gluten-free flours works tremendously well for baked doughnuts, so I don’t recommend making substitutions. I promise no one will ever know these are gluten-free! They hold together perfectly and have a tender, doughy texture. They are surprisingly close in texture to a fried cake doughnut. You will definitely be surprised!
Next up, we’ll whisk in the wet ingredients. No mixer or fancy equipment needed.
After thoroughly greasing your doughnut pan you’ll spoon the batter in about 1/4-inch from the top of the pan. I prefer to grease with softened butter or coconut oil as the sprays tend to leave a sticky residue over time and don’t work as well.
The doughnuts are ready for the oven!
About 18-22 minutes later you have perfectly golden brown baked doughnuts. Now your main goal is to wait for them to fully cool before stuffing them into your face.
Okay, you can stuff one of them into your face while you wait but the texture will firm up as they cool.
Now for the glaze. I mean glazes. Yep, two. I mixed up a batch of basic vanilla glaze and then split the mixture into another bowl. Then I added cocoa powder and a bit more cream for an easy chocolate glaze. Because how can you ever choose between vanilla or chocolate glaze??
The answer is you can’t, so you make both.
After a little dip action into the bowls of glaze they’re ready for a dunk into sprinkles.
Hubba, hubba…
And now the only thing left to do is let the glaze set—or not.
The details for this basic Buttermilk Baked Doughnut recipe with Vanilla + Chocolate Glaze can be found over on Craftsy, where I write freelance posts and recipes each week! You’ll find all of the step-by-step instructions along with tips for grinding your own flours at home.
And don’t forget! This week only you can get 35% off my book Baked Doughnuts For Everyone! You’ll find over 100 recipes inside along with a slew of tips + tricks for creating perfectly baked doughnuts at home. For more details check out my Book Page.
Discount Code: doughnut35 – enter this in the “promotion/coupon code” field after clicking “add to cart”
Happy Wednesday!
Ashley


