Food Photography Tip of the Week |6|
How do you capture steam in photos?
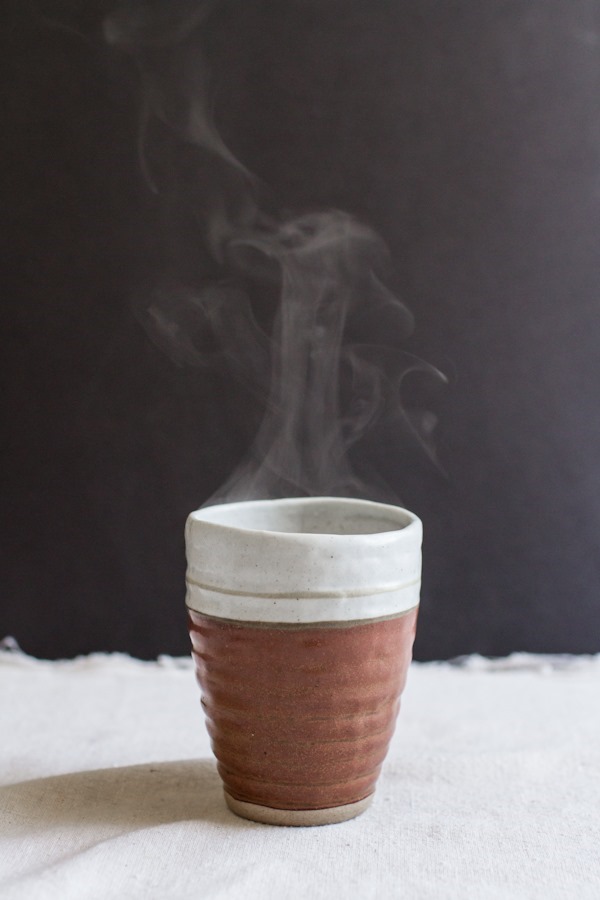
Things are gettin’ hot over here today with a little bit of steam action. Have you ever wanted to learn how to capture those pretty clouds of steam coming from your mug of coffee or bowl of soup? It’s actually pretty simple!
Steps to capturing steam:
- Keep your shutter at a minimum of 1/200 to capture the movement of the steam without being too blurred. The faster your shutter the more detailed the steam will be.
- Set up the shot exactly how you want it before placing the hot liquid in the mug/bowl/etc. Take a few test shots to make sure you like the styling.
- Use a tripod. Even though you’re shooting with a high shutter speed with less chance for an out of focus image, I find it very helpful to use a tripod. It will allow you to fully set up the shot before you take it. You’ll have to work quickly to capture the steam and not having to hold the camera will make your job easier.
- Use side-light and a dark, contrasting background. This will make the steam pop in the photo.
- Or, use back-light and shoot on a dark surface if you want the steam to have a softer, creamier feel.
Simple as that! And I have a super easy method to practice this trick which you’ll see below.

I really had to crank the ISO to get these photos properly exposed with a high shutter speed.
Above // ISO: 1250 SS: 1/400 f: 3.2
Below // ISO: 1250 SS: 1/800 f: 1.8
The main difference between the two images is the sharpness of the steam and mug. The photo below is much more wide open [smaller f-stop], causing the steam to have a bit more of a hazy, out of focus appearance.
You’ll also notice the shutter speed was much faster in the image below. You would think with a shutter that high it would capture more detail but it still is quite hazy due to the wide f-stop of 1.8. If the shutter speed would have been slowed down to 1/200 it would have had an even blurrier look. But here, the main reason for the blur was the shallow depth of field.
Let’s do a quick aperture/f-stop review for a moment:
- the smaller the f-stop -> the wider the opening -> the narrower the depth of field -> less in focus
- the larger the f-stop ->the tighter the opening -> the wider the depth of field –> more in focus
It can be confusing because the phrase “wide open” refers to a small f-stop number and not a wider depth of field.

To practice steam photography:
Boil a pot of water and keep it boiling during this exercise. Grab a mug or whatever you want the liquid to steam from. Get your tripod, camera, and steam set while you’re waiting for the water to boil. Add boiling water to your mug and start shooting. Replace the water when the steam starts to dissipate. Test different shutter speeds and apertures then note the difference between the settings and how the photos look when you bring them in for editing.
What not to do:
Using a white [or lightly colored] background with side-light does not get the job done. You can see the steam creeping out at the very top of the mug and then it disappears into the white abyss.

And now for a little backlit action. I have light coming in from behind the mug and to the left of the mug. I originally had a black board blocking the light to the left but much preferred the image with light coming from both angles.

This approach has a more real-life quality to it and doesn’t feel as staged. I kept the depth of field very shallow to produce a super soft image.
ISO: 640 SS: 1/400 f: 1.8

I just love the soft, milky quality of the steam.
ISO: 1250 SS: 1/800 f:2.0

And zoomed out just a bit I gently blew towards the hot water as the steam was starting to die and it gave a brief burst of steam.
I imagine if you actually had coffee or a dark liquid in the mug the steam would show up even stronger.
ISO: 1250 SS: 1/800 f:2.0

It’s definitely something I need to keep practicing and not just in the moment when I’m making and photographing a recipe. I always get frazzled when experimenting during a photo shoot where I actually need the photos to come out.
Have you mastered the steam photography technique or have any other tips to add?
Ashley


