Food Photography Tip of the Week |3|
/Food Photography Tip of the Week |3|
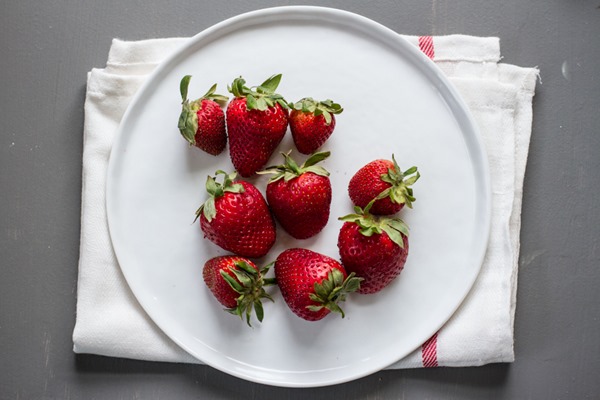
Try adding a textured surface to give your photos a bit more natural, life-like quality.
This is not to say that a textured surface is always the right way to go. It is, however, one tool you can try if you’re looking to add something new to your photos.
It all depends what you’re going for. Do you want a clean and very simple photo? In that case a flat surface may be best. Do you want a moodier, more natural feel? Try adding texture with natural fabrics, wood, crinkled parchment or brown bags, burlap, etc.
You can use them as a surface or a backdrop but for today I focused on surfaces [since I’m currently enamored with bird’s-eye-view photos].
To start, I placed a cut avocado on a flat piece of wood. It contrasts well and is fairly simple with a bit of shadow at the bottom of the image.
Now let’s try adding some texture.
I placed a kitchen towel over the gray surface and allowed the folds and ripples to stay put.
This adds shadow and a bit of movement while not distracting away from the avocado. The natural colored fabric also gives the photo a softer feel.
I’m a big fan of keeping surfaces and backdrops simple but layering textures can sometimes be nice. The burlap offers a tightly woven, flat textured surface while the towel pattern is much larger in scale creating contrast with the burlap. The towel also adds contrast in color with the avocado, ties in the green, and adds shadow when the avocado is placed on top.
For another example:
I placed a clean sheet of parchment paper on top of black foam board which set a moody tone but crinkled parchment over burlap gives a much more rustic, natural quality to the photo. It gives a more real-life quality in my eyes.
The asparagus is fairly simple in color and not overly textured [in comparison to something like curly kale], so the crinkled parchment paper works well as a surface to place the roasted asparagus on top of.
Another example of layering textures which adds to the image but doesn’t distract from the food.
I couldn’t be more excited for this series and am happy to hear you are all enjoying it as well!
What are your thoughts on tip #3? Have you experimented with textures?
Ashley

![Food Photography Tip of the Week [ed.3] | edibleperspective.com Food Photography Tip of the Week [ed.3] | edibleperspective.com](https://static1.squarespace.com/static/546ab118e4b020f024f62077/54f4d9c8e4b0a2a4bf5bcbe5/54f4da05e4b0a2a4bf5cd92c/1395720634063/Windows-Live-Writer-40a10f53faf0_1073A-)
![Food Photography Tip of the Week [ed.3] | edibleperspective.com Food Photography Tip of the Week [ed.3] | edibleperspective.com](https://static1.squarespace.com/static/546ab118e4b020f024f62077/54f4d9c8e4b0a2a4bf5bcbe5/54f4da05e4b0a2a4bf5cd931/1395720638117/Windows-Live-Writer-40a10f53faf0_1073A-)
![Food Photography Tip of the Week [ed.3] | edibleperspective.com Food Photography Tip of the Week [ed.3] | edibleperspective.com](https://static1.squarespace.com/static/546ab118e4b020f024f62077/54f4d9c8e4b0a2a4bf5bcbe5/54f4da05e4b0a2a4bf5cd934/1395720642098/Windows-Live-Writer-40a10f53faf0_1073A-)
![Food Photography Tip of the Week [ed.3] | edibleperspective.com Food Photography Tip of the Week [ed.3] | edibleperspective.com](https://static1.squarespace.com/static/546ab118e4b020f024f62077/54f4d9c8e4b0a2a4bf5bcbe5/54f4da05e4b0a2a4bf5cd939/1395720648033/Windows-Live-Writer-40a10f53faf0_1073A-)
![Food Photography Tip of the Week [ed.3] | edibleperspective.com Food Photography Tip of the Week [ed.3] | edibleperspective.com](https://static1.squarespace.com/static/546ab118e4b020f024f62077/54f4d9c8e4b0a2a4bf5bcbe5/54f4da05e4b0a2a4bf5cd93b/1395720652003/Windows-Live-Writer-40a10f53faf0_1073A-)
![Food Photography Tip of the Week [ed.3] | edibleperspective.com Food Photography Tip of the Week [ed.3] | edibleperspective.com](https://static1.squarespace.com/static/546ab118e4b020f024f62077/54f4d9c8e4b0a2a4bf5bcbe5/54f4da05e4b0a2a4bf5cd93d/1395720657213/Windows-Live-Writer-40a10f53faf0_1073A-)
![Food Photography Tip of the Week [ed.3] | edibleperspective.com Food Photography Tip of the Week [ed.3] | edibleperspective.com](https://static1.squarespace.com/static/546ab118e4b020f024f62077/54f4d9c8e4b0a2a4bf5bcbe5/54f4da05e4b0a2a4bf5cd93f/1395720662393/Windows-Live-Writer-40a10f53faf0_1073A-)


